Pages

Saturday, December 21, 2019

Merry Woofmas with Bella Blvd!

I love everything about the Bella Blvd Santa Squad collection, especially the little dog graphics! They are perfect for documenting a couple Christmas photos of my Cairn Terrier, Pixie! And I am thrilled that Bella Blvd offers cut files now because I had so much fun working with them on this layout! 

At first I was going to create a layout using the entire Bella Blvd Bird Wreath Christmas cut file, but then I decided the bottom part of it would make a fun accent to the top of my layout. I then embellished this piece  with Bella Pops pieces, Ephemera Icons, and Epoxy Hearts. I love the fun unexpected detail it adds to the page.

I used the Bella Blvd Triangle Trees Cut File to create a large tree on my page. I decorated my paper tree with Santa Squad Ephemera Icons, Doohickey Stickers, Gingerbread Acrylic Shapes, and some Snow Fun Epoxy Snowflake Shapes. I usually want to just hoard the Bella Pops because they are THAT cute, but it made me feel so good to actually use one here! I love the Dachshund Through the Snow doggie Bella Pop under the Christmas tree! 

I used the fun Bella Blvd Merry Word Cut File and a Bella Besties patterned paper for part of the title. I then embellished this section with more adorable Ephemera Icons pieces, Chipboard Shapes, and Epoxy Heart Shapes. Did you notice the little Epoxy Candy Cane Shape I added to the dachshund's mouth?

Thanks for stopping in today. I hope I have inspired you to grab some of the adorable Santa Squad collection and document some Christmas pictures of your squad...fur or no fur! 

51018218_10161492020195551_8905417111170449408_n
Santa Squad Collection: All Wrapped Up Patterned Paper, Tree Trimming Patterned Paper, Santa Delivers Patterned Paper, Borders Patterned Paper, Ephemera Icons, Doohickey Stickers, Squad Epoxy Shapes, Hearts Christmas Mix, Snow Fun Epoxy Shapes, Gingerbread Acrylic Shapes, Dachshund Through the Snow Bella Pop
Bella Besties Graph & Dot Patterned Paper: Guacamole, Ice

Friday, December 13, 2019

Merry Disney Christmas with Doodlebug Design!

I couldn't wait to play with the Doodlebug Design Christmas Magic Present Cut File when I first saw it. And of course I paired it with the Christmas Magic collection, which was perfect for documenting a couple photos from our Christmastime trip to Disney World. I had so much fun creating this colorful page! 
I started by using one of my favorite papers from this collection, Plaidsome Tidings, for my background. I used the adorable Boughs of Holly Washi Tape to make a festive border around my white background. I then used the cute Doodlebug Design Christmas Magic Present Cut File and Doodlebug cardstock to cut out presents in coordinating colors. I embellished the presents with Odds & Ends pieces, This & That Stickers, Chit Chat pieces, and epoxy stickers. 

I embellished these other presents with Mini Icons Stickers, epoxy stickers, and Odds & Ends die cut shapes. I then used a die cut from the Chit Chat pack for a quick page title and embellished it with Teensy Type alphabet stickers and an epoxy candy cane sticker. 
I love how well the Doodlebug Design cardstock works with my electronic die cut machine. It cuts so smoothly and doesn't tear or rip like some other cardstocks do! And I just love the rainbow of Christmas presents on this page! I can't decide which one is my favorite, can you?! 

Thanks for joining me today! I hope I have inspired you to grab some of the Christmas Magic collection and (if you have a die cut machine) the Christmas Present Cut File and create your own rainbow of presents! 

Doodlebug Design Product Used
Christmas Magic Collection
Cardstock: Raspberry, Ruby, Bumblebee, Limeade, Sea Glass, Bon Bon
Alphabet Sticker: Teensy Type in Swimming Pool
Doodle Twine in Swimming Pool

Sunday, December 1, 2019

Here Comes Santa Claus with Doodlebug Design!

The Doodlebug Design Christmas Magic collection is just simply adorable and perfect for documenting Christmas memories. I love the mix of yellow, pink, and aqua combined with the traditional red and green colors. And I couldn't wait to create a page with the adorable die cut Santas from the Odds & Ends die cut pack! 

I started with a piece of Lemon Floral-Graph Petite Prints patterned paper at the top of the page. I wanted to loosely create a 'scene' where the Santa in the chimney die cut was at the top of the page like he is up on the roof. I embellished around him with adorable elves Mini Icons Stickers. The Tiny Heart Shape Sprinkles add a sweet little accent. I then used the Abigail Alphabet Stickers in Bon Bon to start my title with 'Here Comes...'.

And of course I had to include one of my favorite die cuts in the Odds & Ends pack ~ the banner! I embellished it with the Holly & Pine and Peppermint Twist Enamel Shape Stickers for a little fun added dimension. I then embellished around the photos with more Odds & Ends pieces and Tiny Heart Shape Sprinkles stickers.

For my 'inside the house' scene below I then used the Christmas tree cut file from the Doodlebug Design Santa in Car Cut File and my die cut machine to cut out the tree. I embellished it with Odds & Ends shapes, Enamel Stickers Shapes, Mini Icons Stickers, and Teensy Type Alphabet Stickers. Isn't that winking Santa Claus die cut just the cutest?! 
Thanks for stopping in today! I hope I have inspired you to grab some of the Christmas Magic collection and document some of your favorite Christmas memories!

Doodlebug Design Products Used:
Christmas Magic Collection
Abigail Alphabet Stickers in Bon Bon
Teensy Type Alphabet Stickers in Ladybug
Santa in Car Cut File

Wednesday, November 20, 2019

Thankful For Us Layout


Since this week is all about things we're thankful for, I wanted to document the most recent photo of hubby and I. I am grateful for him every day and I appreciated the fact that we finally made some time for a date night. I love making colorful backgrounds using cut files and so I couldn't wait to use the Bella Blvd Leaves Cut File! And I LOVE all of the color and fun elements that the Bella Blvd Squeeze the Day collection adds!


I used the adorable Bella Blvd Leaves Cut File to create this fun background. The leaves come with a few different layering parts so I welded them together in my cutting machine software to create one leaf shape. I then just had fun rotating them and placing them in a scattered leaf circle. I then cut this pattern out of white cardstock and backed it with colorful Squeeze the Day patterned papers. I used Heart Hugs, heart stickers, Ephemera pieces, and Word Salad Stickers to embellish the leaves. Aren't they just so much fun?!


I then used all 3 layers of the leaves cut files to create a few colorful leaves to place around my photo. I used Florence Alphabet Stickers to start my title and the 'US' Ephemera die cut to complete it. The little round enamel dots are great for adding little extra pops of color!


I absolutely love all of the color on this layout! And the little unexpected fruit slices add the cutest little design elements. All of the leaves are just so cute, I can't decide which are my favorites! Can you?!? 


Thanks for stopping in today! I hope I have inspired you to document someone you are thankful for with a colorful collection like Squeeze the Day! 


Doodlebug Design Christmas Magic


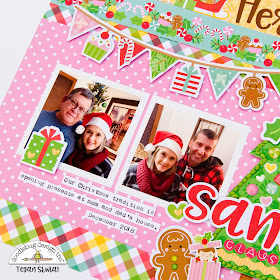
I absolutely love Christmas and so I couldn't wait to create projects with the new Doodlebug Design Christmas Magic collection. The mix of Santas, reindeer, gingerbread men, and adorable colors just makes me happy. I love creating fun cut out backgrounds for my pages, so I also used the tree cut file from the Doodlebug Design Santa in Car Cut File

I used the tree cut file (again from the Doodlebug Santa in Car Cut File) to create a large background design of trees. I then backed each tree with fun patterned papers from the Christmas Magic collection. I used the adorable Tiny Heart Shape Sprinkles to give each tree a topper. This tree design turned out so pretty I almost didn't want to cover the trees up! I then used pieces of the Candy Stripe Washi Tape to embellish the top and bottom of the page.  

At the top, I added the banner sticker from the This & That Sticker Sheet and a reindeer sticker from the Mini Icons Stickers. I also used the Holly & Pine, Peppermint Twist, and Cookies & Candies Shape Sprinkles to embellish the Christmas tree background.

I added a few of the Peppermint Twist Shape Sprinkles to the scalloped circle sticker for some fun dimension. I further embellished it with Odds & Ends pieces and a Mini Icons Sticker reindeer. 


I used part of an Odds & Ends banner die cut to anchor my photos. I then used some Teensy Type number stickers in Limeade to put the year (2018) on the banner. And isn't that Santa and little elf die cut Odds & Ends piece just the cutest?! 

Thanks for stopping in today! I hope you are just as excited about scrapbooking Christmas layouts as much as I am! Have a great day! 

Doodlebug Design Products Used
Christmas Magic Collection

Saturday, November 9, 2019

Mini Bags with Bella Blvd Santa Squad!

Christmas will be here before we know it, so it's time to get started on the gift making! I used the adorable new Bella Blvd Santa Squad collection, new Bella-Pops, and a Lori Whitlock Tag Bag cut file to quickly put these bags together. They will be perfect for gift cards, candies, or small gifts. I can't wait to give them to friends and family members! 

On this bag I started with the plaid Santa Baby Patterned Paper for the bag base. I cut the tag out of the red Tree Trimming Patterned Paper and then I put strips of the Red Stripe Washi Tape on it. I then used the green "Gift From Santa" tag from the Ephemera Words pack and the S is for Santa Bella-Pops sticker. The new Bella-Pops are very three-dimensional so they make great goody bag accents! 

On the second bag I started with the tree print Tree Trimming Patterned Paper on the bag base and used the plaid Santa Baby Patterned Paper for the tag. I then used a sentiment die cut and the Dachsund Through the Snow Bella-Pop to embellish the bag. And that adorable enamel candy cane is from the Squad Epoxy enamel sticker pack.

On this last bag I used the All Wrapped Up Patterned Paper to cut out the bag base. I again cut the tag out of the red Tree Trimming Patterned Paper and added strips of the Red Stripe Washi Tape. A die cut from the Ephemera Words pack quickly adds a cute sentiment. And the adorable Spread Some Cheer Gingerbread and cupcakes Bella-Pops add a whole lot of cuteness!  I can't decide which adorable bag is my favorite, can you?! 
Thanks for stopping by today! I hope I have inspired you to grab some of the adorable new Santa Squad collection for your next Christmas craft! Have a great day!  
51018218_10161492020195551_8905417111170449408_n
Santa Squad Collection: Tree Trimming Patterned Paper, Santa Baby Patterned Paper, All Wrapped Up Patterned Paper, Ephemera Words, Squad Epoxy Enamel Shapes, Dachsund Through the Snow Bella-Pop, S is for Santa Bella-Pop, Spread Some Cheer Bella-Pop, Red Stripe Washi Tape
Other: Lori Whitlock Tag Bag Cut File


Saturday, November 2, 2019

Hocus Pocus with Doodlebug Design!

Real life spiders scare me, but I can't get enough of the cute spiders from the fun new Candy Carnival collection! And I usually avoid real life spider webs, but I am having a blast playing with the Doodlebug Design Booville Spider Circle Cut File! It is safe to say, the only spider web I'd like to get tangled up in is the patterned paper one on my layout! Ha!

To make the spider web cut out, I used the Booville Spider Circle Cut File and gray cardstock to make the spider web about 8 inches tall. I then backed each section with some of my favorite Candy Carnival patterned papers. I used the scalloped circle Hocus Pocus sticker for part of my title and embellished it with adorable candy shaped Candy Carnival enamel pieces.

I added a Jolly Jack-O-Lantern enamel shape to the hot air balloon odds & Ends piece for fun! And aren't the jack-o-lantern die cut shapes just darling?!

One of my favorite die cut pieces from the Candy Carnival Odds & Ends pack is the banner! I added a couple Sweet Treats enamel shapes to it to add a little dimension. I also love the colorful pinwheel Odds & Ends pieces too because they make me think of what Halloween fireworks might look like.

Thanks for joining me today! I hope I have inspired you to grab some of the Candy Carnival collection and document your favorite Halloween photos!

Doodlebug Design Products Used:
Candy Carnival Collection
Doodlebug Design Booville Spider Circle Cut File


Monday, October 28, 2019

Sweet & Spooky Mini Album

I was in love with the Bella Blvd Black Cat Cut File from the moment I saw it. I am so happy that it gets to take center stage as the cover of my mini album!
I created the cover by using my electronic diecut machine to cut out at least 4 of the kitty/pumpkin base shapes from extra cardstock. I then adhered all of these layers together to make the cat sturdy enough to stand up on his own. And of course I had to use the adorable Sweet & Spooky collection!

I used another solid black cardstock cutout to make the backside silhouette of the cat for the inside front cover. To make the remaining pages, I used just the pumpkin shape to cut out 10 pumpkins from extra cardstock. I then adhered them together in groups of two to make my base pages a little more sturdy. Then I repeated the process by cutting out pumpkins using patterned papers to adhere on top of the pumpkin base pages.

The Sweet & Spooky collection is perfect for documenting all things candy around Halloween time! Here I used the black enamel dots from the Heart Hugs pack to fill in some of the dots on the candy ephemera piece to make it look a little more spooky.

I love that the Bella Blvd Ephemera packs include the cutest little journaling pieces like the one on this page. And the googly eyeball patterned paper is one of my favorites in this collection!

Sometimes it's fun to create a page with all embellishments! I used the Bella Blvd Spider Web Cut File to create this fun background web. And I love the texture that the Heart Hugs add to the page!

All of the Ephemera pieces are so fun to mix and match with the patterned papers.

I love everything about the Sweet & Spooky collection so I can't decide which mini album page is my favorite! All of the Ephemera pieces and stickers and Heart Hugs are just the cutest!  Which page is your favorite!?

Thanks for joining me today! I hope I have inspired you to grab some Sweet & Spooky and create your own fun mini album!


Sunday, October 20, 2019

Fun Journaling with Bella Blvd

 I love that Halloween is fast approaching! So I grabbed the super cute Bella Blvd Sweet & Spooky collection and documented some of last years photos! I also adore all of the Bella Blvd cut files and I knew I wanted to somehow creatively add my journaling to one of them. I decided to use the web from the Bella Blvd Spider Web cut file to make background elements, so I figured the spider would be a fun place to put my journaling.

I used the spider from the Spider Web Cut File to cut out the spider from black cardstock. I then trimmed off the existing legs and added my own spider legs using strips of black cardstock thick enough to hold my typed journaling. I added some black round enamel dots (from the Heart Hugs pack) to give his eyes dimension. I then embellished my title with Sweet & Spooky Ephemera pieces, black puffy star stickers, a die cut spider web, and more enamel dots.

I love that the Ephemera pack contains the 'Sweet & Spooky' die cut phrase. It makes for a super easy, yet super cool title for my page. I hand cut a pair of eyes out of the Watching You Patterned Paper and placed them so it looks like they are peering out through the title. And of course, I finished off the layout with more adorable Ephemera pieces, chipboard stickers, and Heart Hugs!

I hope you love my die cut and handcrafted creative journaling spider as much as I do. And I hope I have inspired you to create your own fun journaling die cut! Thanks for joining me today and have a great day! 
Sweet & Spooky Collection: Chipboard Icons Stickers, Sticky Mix Stickers, Ephemera Icons, Words Icons, Web Crawler Patterned Paper, Talk to the Head Patterned Paper, Watching You Patterned Paper, Night Garden Patterned Paper, Smell My Feet Patterned Paper
Heart Hugs: Halloween, Sunshine


Boo! Layout with Doodlebug Design

I love everything about Halloween so it's no surprise that I can't put down the new Doodlebug Design Candy Carnival collection! The bats are adorable, the skeleton guy is so cute, and the colors just scream Halloween fun! This collection was perfect for documenting some of my favorite photos from my last visit to Disney World at Halloween time.

I started off by creating a fun background of three tone-on-tone patterned papers to make my background. I used the Ticket Booth, Star Attraction, and Costume Contest patterned papers. I then used white cardstock and the web from the Doodlebug Spider Circle Cut File to cut out 5 webs. I then backed them with different fun designs from the 6x6 Paper Pad. And how adorable is that skeleton Odds & Ends piece? Did you notice the little Sprinkles enamel shaped cupcake I added in his hand? 

I embellished my second photo with more Odds & Ends pieces, Mini Icons Stickers, and star shaped Sprinkles. I added a couple eyes from the Eye See You Sprinkles to the 'BOO!' Odds & Ends piece that is my title. Did you also see that I added a candy apple Sprinkles enamel shape in this gal's hand too? 

What is your favorite part of the Candy Carnival collection?! It is filled with so many fun (and YUMMY!) elements and embellishments I personally can't decide on a favorite! 

Thanks for joining me today! I hope I have inspired you to grab some Candy Carnival and document your last Halloween get together! 

Doodlebug Design Products Used
Candy Carnival Collection