Friday, July 18, 2014

Scrapping large photos!

Good day everyone!  Today I am showing off Pink Paislee's fabulous Solstice collection!  The Solstice collection is perfect for all of your summertime photos no matter how small- or large- they are!   On this layout I took a single photo of our city’s lighthouse at sunset and made it the dominant image on the page.   I completed the layout with pieces from the fabulous Solstice collection and I love the way it turned out!  To get a FREE downloadable instruction sheet on how to make this layout, hop on over to the Pink Paislee blog!
 
To get this fun look, I started with the Kauai patterned paper. I used the front side with the cool design.
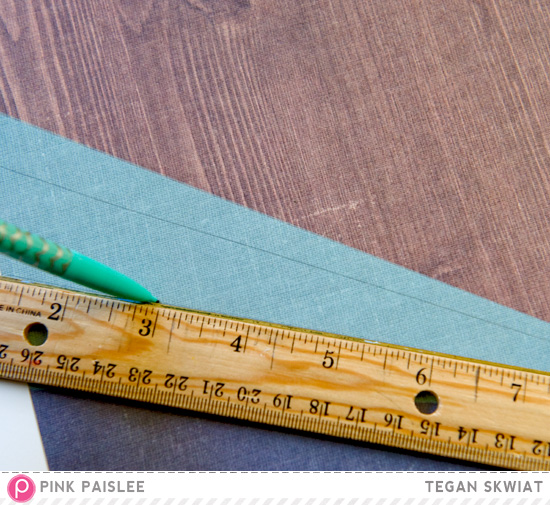
I trimmed the star burst design from the paper  and added more panels of patterned paper to it.  To do this,  I simply used my ruler and a pencil to make lines of where I wanted to insert the panels.
I then carefully hand trimmed out sections and backed those sections with my favorite patterned papers from the Solstice collection!   I now have a detailed  star burst design!   For added texture, I machine stitched over the star burst design.
 
I finished the star burst design off with some lovely ephemera bits, gold foam shapes, and puffy stickers!  I just adore the look that the gold pieces add to this collection.
 
The teal glitter on some of the ephemera pieces and the glitter alphabet from this collection make my heart go pitter patter!  It seriously is the perfect shade of teal!  And who doesn’t love glittered seahorses?
 
Thanks for stopping in! And don't forget to download the FREE instruction sheet for this layout right HERE!  Have a great day everyone!
 
Hugs, Tegan


Monday, July 14, 2014

Boy Oh Boy!

Good day everyone!  Carta Bella's Boy Oh Boy collection quickly grabbed my attention with it's color palette of red, aqua, and gold. It really is a fabulous collection for all things boy!  And I think it has a slightly vintage feel to it, so on this layout I used vintage pictures of my hubby's 4th birthday.  I quickly realized that this Boy Oh Boy collection is perfect for vintage photos too!
 
I used the patterned papers and embroidery floss to make a simple design element on the left hand side of the page. I like that the embroidery floss adds a little bit of texture.
1.  Adhere the paper strips into place.
2.  Use a ruler to lightly make X marks where you would like the stitches.  I used the pencil to mark my spots so I could move them if I wanted before I permanently poked my holes.
3.  Poke holes at the end of your X marks.
4.  Use 2 different colors of embroidery floss to stitch X marks across your paper strips.  So easy and so fun!
 
The title here is my favorite part of the layout.  First off, the banner portion (BOY OH) is from the packaging insert in the collection kit.  Yes you read that correctly!  I loved that banner piece so much I trimmed it from the Boy Oh Boy title on the packaging!  For the second half (BIRTHDAY BOY) I used the Carta Bella Happy Birthday die cut from the Silhouette store.  I simply had my machine re-cut the "B" and "Y".  And the circle star sticker was perfect for an "O", don't you think?
Thanks for stopping in today!
Hugs and happy scrapping everyone!
Tegan


Friday, July 4, 2014

Happy 4th of July!!


Hello!  Today I am sharing a fun patriotic themed layout made with the nautical themed Ahoy There collection by Carta Bella.  The color palette of this seaworthy collection was also perfect for pictures I had taken of my pooch on the Fourth of July!  I pulled out the more neutral pieces of the collection, but still included the rope patterned paper and the compass elements.  I also had a little fun with my electric die cut machine AND my manual die cut machine.   I used parts cut from Carta Bella's sail boat die for decorative elements on my page.  I used the top flag, the mast, and the hull...Can you find them? 
 
I used the sail boat from the coordinating Designer Dies to cut out four sets of sail boats from navy paper.  I then had many parts to work with and build designs from on my project.  And it only took four cuts!  I used a few of the small top flags to embellish a little empty space I had above the banner.  I love the size of these!  
 
I then used the parts of the hull as scalloped banners on the bottom of the page.  These remind me of the patriotic buntings that I see on my neighbor's porch leading up to the Fourth of July!  I then turned the masts sideways and used them as an extra decorative element right above the scallops.  I love that this one little die will not only make an adorable sail boat, but decorative page elements as well! 
 
I also used my Silhouette machine and this awesome Carta Bella Banner (Silhouette store - die cut #34522)  to add some patriotic pizzazz to my title.  I can see myself using this banner over and over again.  It would be great for cards, mini album covers, and birthday parties as well- just to name a few!
 
Thanks for joining me today!  I hope I have inspired you to think a little outside of the box.  I know for me it can sometimes be difficult to do.  I sometimes get in a rut myself.  But it can be fun to explore the not-so-obvious with your scrapping supplies!  So go ahead and be brave!  Use that nautical themed collection on a Fourth of July layout. And take that die cut shape and turn it into something completely different.   You might just surprise yourself!
Ahoy There collection:  Full Steam Ahead, World Traveler, Ship Flags, My Anchor, Good Times, Anchors Away, Sticker Elements, Designer Dies (ship)
Also: Carta Bella die cut image: banner ID#34522
Other:  White cardstock, red cardstock, electric die cut machine, manual die cut machine, sewing machine